Wednesday 12 December 2018

The twelve tips for Christmas

Just in case someone gets a shiny new computer for Christmas - here are a few tips:


1. Diversity is good, consider Linux, Mac etc before Windows.
2. Create installation/recovery disks. Many machines do not provide these any more, they are on a partition, which you can accidentally make disappear.
3. Install from scratch if you can. Leave off all the bloatware that comes with many of the new machines. Typically the apps aren't needed anyway. (create a new recovery disk at the end).
4. Harden the system by removing any unnecessary components.
5. Buy a few years worth of AV/AS protection. Many people use the AV that comes installed with the machine and don't realise that it expires in three months or so. Also install a software firewall - yes, they aren't that great but it's better than nothing.
6. Create a normal user account and an administrator, don't use the administrator user.
7. Make sure all software is auto-updating.
8. Make a backup.
9. Get alternate browser, again diversity is good. Consider Chrome, Firefox, Safari, Opera, .... It's a sad world if 70% of it is vulnerable to the same bug.
10. Secure the browser: e.g. firefox: install the add-ons NoScript and CookieSafe.
11. Grasps the concept that warnings are to be read and understood, not clicked on to get to what you want to do. Such ignored warnings can cost a lot.
12. Learn internet safety. Your bank will never send you an email asking for passwords. Emails asking for money, or spinning sob stories should be ignored. Your credit card number is NOT a verification tool. Don't send chain letters etc, you get the idea.

Tuesday 11 December 2018

Tutorial: CentOS 7 Installation guide for vmware ESX environments (Part 1)

Although this guide is written specifically for ESX environments, it translates easily to other virtual environments. The same general rules apply even if he steps are slightly different. There is an exception for MS HyperV where its easier just to leave the FDD emulation rather than removing it.

If you're installing RHEL, Fedora, OL or Scientific Linux rather than CentOS, most of the installation will apply although OL has very different recommendations. The instructions here detail a minimal install (Micro-Instance) which will give you an very basic server. Instructions for different footprints will follow in subsequent blog entries. These instructions are based on the 7.4 release of CentOS.

Best practice is to install CentOS from either the NetInstall ISO or the Minimal ISO. Currently, the NetInstall (rev 1708) is 422MB. The Minimal is 792MB. The minimal install contains everything needed to setup a basic server. Additional services must be installed from repositories. The NetInstall requires an active Internet connection (and hence a working NIC) in order to complete even a basic installation. By contrast, the standard ISO is 4.2GiB in size.

It must be assumed that everything is out-of-date as of the initial release. So installing from the standard ISO achieves little as most packages will need to be updated from the repositories. The procedure shown will be using the NetInstall ISO.

FirstCopy the ISO to the vmware ESX server’s ISO folder in the datastore or some location that is easy for you to install from.

Minimal Server Installation (Micro-Instance)


1) Create new server in ESX using ‘typical’ configuration and give it a name.
2) Select the Datastore for the vmdk files and press next.
3) Select Operating System (Linux, CentOS 64bit)

4) Select appropriate NICs. You will need at least one that has access to the Internet. You can add others now (preferably) or later. Make sure you use the VMXNET3 adapter with connect at power on. Use of the e1000 adapter has been shown to cause problems, particularly during ESX upgrades.

5) Setup virtual disks on the datastore. For a micro-instance, we will need to have it thick provisioned. For larger servers, we can create virtual disks for other partitions – these can be thin provisioned, but any partition containing a boot or swap partition needs to be thick. For larger servers, you will likely have the data-containing partitions on a separate SAN connected via multipath.

The disk allocation for a micro-instance should be between 12GB and 32GB. Larger than that and you should allocate a second(or more) disks. If the specific calls for a specific disk size, definitely create another disk – either thick or thin provisioned. For large footprints, eager zero is preferred, but lazy zeroed is fine for a micro-instance.


6) Edit the VM settings (tick box) and click continue. Modify the settings as follows:
  1. Memory: 2048MB is the default. For a micro-instance, this can be reduced to as low as 1024MB – particularly if you don’t plan on a GUI (which you shouldn’t anyway).
  2. CPUs: 2 virtual sockets with 1 core per socket for micro-instance or medium. Increase only as required by application. By choosing 2 cores, SMP will be installed in the kernel. You can reduce it to one later, but make sure there are at least two at installation time.
  3. Video Card: Leave at 4MB with 1 display unless you need a GUI. Then increase to 12MB.
  4. CD/DVD: Set to the CentOS NetInstall or MinimalInstall ISO you added earlier. Check ‘Connect at power on’.
  5. Floppy: Remove


7) Click ‘Finish’

8) Select newly created server in the client, connect to the console and power on.


There should be no need to test the media, so just select ‘Install Centos’. The CentOS installer will then boot:

CentOS Installation (GUI)


1) Language: Select English and your location in the world. In my case, this is Australia.

2) Installation Summary: You will need to modify ‘Date/Time’, ‘Security Policy’, ‘Installation Source’, ‘Installation Destination’ and ‘Network and Host Name’. Since this is a Net Install, we need to modify the Network and Hostname first.


3) Network and Hostname. Enable the network adapter. This will perform an automatic DHCP. Unless you plan on using DHCP for your servers, you should change this to a static address. Change the hostname to the FQDN of the server.


Use the configure button to change the name of the adapter to something easier to remember. You can also change the MAC address here. This is useful if you are creating an immutable server. Under the ‘General’ tab, select “Automatically connect to this network when it is available”. Set the IPv4 address and DNS settings. Add IPv6 if utilised. Click ‘Save’ and then ‘Done’ when finished.


3) Date/Time: Change the timezone if required. Check that NTP is enabled and working.


4) Installation Source: Enter the Centos mirror address and uncheck the mirror list checkbox. Click done and CentOS will begin updating its repository list.

5) Software Selection: I know this is tempting to select what you want here, but stick with the minimal install for now. The only time you really should select anything is if you are installing a compute node or virtualization host.

6) Installation Destination: For a micro-instance, you can settle for the defaults. This will create two physical partitions. The first (sda1) will be a 1GiB boot partition formatted for xfs (the default now under CentOS7). You can change this to ext4 if you like. The second physical partition will use LVM (Logical Volume Management) with two LVM partitions made up of a 1.5GiB swap partition and the rest allocated to root. For simple servers, this will be adequate. Otherwise, modify it here according to the size/space/capability recommendations. Everything here is completely customisable.


7) Once you click ‘done’. You will be given a list of changes the installer is about to do based upon your selections. Check them carefully before accepting.


8) Lastly, we will need to select a security policy. This is an area often overlooked and most installations will choose the default XCCDF profile which contains no rules, although rule lists can be downloaded and applied here. Unless mandated otherwise, use the Standard System Security Profile. The security profiles are administered by Red Hat and not even vetted by CentOS. You will need to consult RHEL documentation for details. In brief, it contains thirteen rules to ensure a basic level of security compliance.

There is a HUGE caveat with the use of security policies: They are something of a black art and emphasise security above all else. This can result in unpredictable changes to your system without notification.

If you want to harden the CentOS setup, I’ll deal with that later. For now, just select the Standard Profile.

Note: There is a bug with the 7.3.1611 ISO with all four STIG security policies that has been fixed with 7.4.1708. Security profiles "Standard System Security Profile" and "C2S for CentOS Linux 7" can't be used in the CentOS 7.5.1804 installer. A bug causes the installer to require a separate partition for /dev/shm, which is not possible.

We could spend hours here. We won’t. That will come with server hardening - when we get to it.


9) Next, click ‘Begin installation’ and installation will start. The next page will work concurrently with the installation.


10) Create a root user and a normal (administrative) user. Ideally, you will only ever use the root login once. After that we will disable root logins completely except from the console. To gain root privileges, you will need to elevate them using sudo by placing administrative users in the ‘wheel’ group (more on that later).

Set the root password to something long a difficult but easy to remember. Make it at least 15 characters by using a phrase with upper/lowercase and numbers eg: 1veGot4LovelyBunch0fCoconuts. Store this password in a secure place (eg keysoft secured by two factor authentication). You will only need this password once and in case of emergencies.

The second user should be your account or a GP admin user. Make sure the password used is strong.


Once installed, select ‘Reboot’. You should disconnect the ISO at some point. Once the server has booted, you will be greeted with the CLI login screen:


At this point, the installation is complete! Login with your admin user and proceed to configuration.

Tomorrows blog entry will deal with configuration.

Monday 10 December 2018

The shovel or the hole?

This is a lesson that took me long and painful time to learn.

It also explains a lot why superior technologies tend to fall in favour of their lessers, whether it be Beta vs VHS, Ethernet vs Token-Ring, ia32 vs PowerPC, Windows vs (just about any other OS) or HD-DVD vs Blu-ray.

It's all about the shovel and the hole.

Say you want a hole dug in your backyard and you want to contract someone else to dig the hole for various reasons. You either don't have the time, don't like manual labour or you just figure someone else can dig a bigger hole than you. In any case, you narrow the list down to two contractors.

The first says he can dig the hole to a certain depth, with the dimensions you require on time and on budget. No problem, this guys clearly in the running.

The second contractor starts talking about the shovel he's going to use. It's a superior shovel - made from a titanium alloy. Lightweight, faster, better than the competition, it can shift more dirt per shovel than any other and more digs per hour. In the hands of a skilled operator, much more efficient than the competitors shovel.

What's your reaction? What would you say?

You'd most likely say you don't care about the shovel. You only care about the hole.

Your concern is the actual deliverables. If his shovel is really that good, then that should show up in the bid for the project. Oh, but he's a little more expensive, well, because his great shovel costs a lot more, and that's reflected in the overall price.

No points for guessing who wins at this point.

You don't have to read far into The Road Ahead to realise that Bill Gates understood this lesson very early on in the game whilst those around him had no idea.

Before the IBM PC was released, Digital Research's CP/M (and also MP/M) was the dominant Operating System for 8-bit Z80/8080 computers. It was fairly ubiquitous and for many it was an aspiration to own a CP/M computer. Microsoft (then a fairly small software company with only two products) was commissioned by IBM (along with Digital Research and UCSD) to write an OS for the new IBM PC. IBM would sell the new IBM PC and allow people to purchase whichever OS they wanted. The three products were PC-DOS, CP/M 86 and the UCSD P-system. Both Digital Research and UCSD structured per-unit licencing for their OS. Microsoft, however, pitched a flat-fee to IBM at a low price. IBM could then charge whatever they wanted and keep every cent. This incentivised IBM to sell MS-DOS at whatever price they could. MS-DOS (marketed by IBM as PC-DOS) sold for $40, CP/M-86 sold for $240 and the P-System cost a whopping $499. As a result, 96% of IBM PCs shipped with MS-DOS. It didn't take long for MS-DOS to be the only OS available for the IBM PC.

Microsoft didn't make very much from the initial deal with IBM, but once the clones starting appearing, 'MS-DOS' had to be purchased from Microsoft - unless the manufacturers also cut a deal with Microsoft.

The rest - as they say - is history. The clearly superior (for the time) CP/M-86 was left to be lamented by its cadre of faithful users.

Another example I can think of is a microwave I saw once for sale that proudly advertised "With inverter technology!" Now I doubt more than 1% of people would know what an inverter was, let alone pay an extra $50 for it. If instead they had said "Heats food more evenly", that would have been different.

IBM used to have a TV advertisement that illustrated this effectively. An IT Manager is called into his boss' office and told "I need you explain our web strategy to the board." He quickly replies "Sure, no problem." To which his boss adds "In terms they can understand." A look of horror crosses the IT Managers face for a few seconds before he blurts out "Every buck we spend this year will make us two bucks next year!"

I experienced something similar to this when I worked for AV Jennings. I had given what I thought was a short presentation in lay terms to the IT Steering Committee explaining our DR plan. After I finished I asked if there were any questions; there were none so I left the room and that was it. A few months later my boss came out of a Steering Committee meeting and said "I found out how to use you in those meetings". In response to my quizzical reply he said "I went into the meeting prepared to answer questions on eight topics, but they peppered me with questions about a topic I wasn't prepared for. They started grilling me on why I didn't know the answers and I said 'Look, I'm just not across all the technical details, if you want I can get Wayne in to answer them.' They stopped me and said in unison 'No! No! No! That's fine! Don't bother.'"

As an IT professional, you may have your favourite OS, hardware platform, dev tool, app environment, programming language - whatever. You may have excellent reasons why it is the ants pants. However, your client doesn't care. Chances are they are so far abstracted from your reality it is difficult for you to be objective about it. However it's crucial that you try to view the world from the user perspective. What you deal with on a daily basis may as well be a black box that runs on magic to them. Importantly, perspective is the key.

Novell had an email suite called Groupwise that was vastly superior to Microsoft Exchange (arguably it still is). Groupwise 7 had five separate btree databases including a guardian database to check and rebuild any of the other databases if necessary. The message database had 128 separate data stores. It supported live migration of users between post offices, live in place upgrades and dynamic load balancing. This at a time when Exchange 2003 stored everything in one large, slow ISAM database. The TCO of Groupwise was one tenth of Exchange 2003.

Unfortunately, the Groupwise client application sucked. The client also would only work with Groupwise.

In contrast, Outlook could talk to pretty much anything (including Groupwise). The end user didn't know anything about btree databases, dynamic load balancing, separate data-stores or the fact the sysadmin could upgrade the email system in 40 minutes with zero downtime instead of it taking three weekends to do so. That, after all, was the sysadmins JOB.

But they did that they could get nicely formatted email messages with graphics in-line: something the Groupwise client couldn't do. And for those that deployed the Outlook client with Groupwise, there where lots of nice 'features' of the client that would only work with Exchange. Couple that with the fact that when your boss' boss plays golf with a Microsoft exec, then your opinion as an engineer is not going to count for very much.

The whole Groupwise/Exchange war could easily have been won by Novell if they'd had spent a bit more time and effort on the client application.

And what applies to large companies applies equally well to you as an IT Professional. Take a close look at the deliverables your client needs. Think of the user experience and what could enhance it. Anything that that you regard as important but the client either doesn't or wouldn't understand, list these as a secondary benefits under one grouping or make it an optional extra if you can. The client has what they what in mind and you can bet lowest price is high on that list.

Remember: It's all about the hole - not the shovel.


Sunday 9 December 2018

Regular Expressions (or how I learnt to stop worrying and love SED)

Let me start from the outset and explain that this is old skool stuff. If you don't like old skool and simply MUST have a single-purpose app for everything, then you may as well stop reading now. However, if you regularly find you need alter the content of a stream of data in some way and you've never used regular expressions, then this is the ticket for you.

Regular Expressions

The human mind is particularly good at recognising patterns - even patterns that are kinda rubbery, however we tend not be very fast at it. On the other hand computers are also fast at recognising patterns they fall down at the rubbery bit. The keys is to tie the both the fast and rubbery bits together with a "grammar" that is clear, concise and effective. Regular expressions are an effective way to do this. You can get very detailed information on regular expressions here. I will only be providing an intro on this blog.

A regular expressions is usually defined between forward slashes /like this/. Pretty much anything can be a regular expression, however the real strength of it comes from utilising special characters and operators. For example:

/[Nn]ame/

will match "name" and "Name" as anything within [] brackets will match.

/gr[ae]y/

will match "grey" or "gray". Similarly:

/Section [A-C]/

will match "Section A", "Section B" and "Section C". An email address can be matched with:

/[A-Za-z0-9._%+-]+@[A-Za-z0-9.-]+\.[A-Zaoz]{2,4}

Another example is matching an IPv4 address. If I see 192.168.100.100 - I know immediately it is an IP address, but how to find one using regular expressions?

/[0-9]{1,3}\.[0-9]{1,3}\.[0-9]{1,3}\.[0-9]{1,3}/

Normally, a '.' will mean match anything, however using a backslash before anything renders it literally. So, if we want to search for a dot, then we need to use '\.'. The curly braces indicate the range of how many times the preceding statement is repeated - in this case {1,3} means it can be repeated from 1 to 3 times. If we were searching for an Australia style phone number, our grammar would be:

/\(0[1-4,7-9]\) [0-9]4\-[0-9]4/

The special characters used in regular expressions include:
  • \ the backslash escape character.
  • ^ the caret is the anchor for the start of the string,
  • $ the dollar sign is the anchor for the end of the string.
  • { } the opening and closing curly brackets are used as range quantifiers.
  • [ ] the opening and closing square brackets define a character class to match a single character.
  • ( ) the opening and closing parenthess are used for grouping characters (or other regexes).
  • . the dot matches any character except the newline symbol.
  • * the asterisk is the match-zero-or-more quantifier.
  • + the plus sign is the match-one-or-more quantifier.
  • ? the question mark is the match-zero-or-one quantifier. 
  • | the vertical pipe separates a series of alternatives.
  • < > the smaller and greater signs are anchors that specify a left or right word boundary.
  • - the minus sign indicates a range in a character class
  • & the ampersand is the "substitute complete match" symbol.

GREP

The utility Get Regular Expressions and Print is one I use almost as much as ls. Grep will print only the lines of a file (or a data stream) that satisfy the supplied regular expression. The switch '-v' will print the lines that don't match. For example

grep -i dog file.txt

Will print lines of file.txt containing the word 'dog' regardless of case. More practical is to use it with a stream. eg:

dmesg | grep eth0
grep -i documentroot /etc/httpd/conf/httpd.conf
mount | grep  'dev\/sd'

SED

I was first introduced to sed by a sysadmin at the University of Wollongong when I was an undergrad student there. It was like the missing arm I never knew about. Since then I've used sed almost daily. Short for Stream EDitor, sed takes a stream of data and performs operations on it specified by the regular expression. The operator I use most is the 's' or substitution operator. This operator looks for a regular expression in a data stream and replaces it with a substitute regular expression (which can be nothing). The following sed example is one I use to automate the creation of a wordpress configuration file:

cat wp-config-sample.php | sed 's/database_name_here/wordpress/g' | sed 's/username_here/wordpressuser/g' | sed 's/password_here/password/g' > wp-config.php
 
Of particular use is the sed one-liners page, which gives lots of very useful, but simple sed scripts.

AWK

The final tool in the old skool trinity is awk: Almost a programming language in itself, awk is a powerful script processing engine that provides the glue between sed and grep. Its utility lies in its ability to work both from the command line with streams of data and to execute as a script from a file. An example of a simple use of awk in conjunction with grep and sed is:

top -n 1 -b | grep "load average:" | sed -e 's/,//g' | awk '{printf "%s\t%s\t%s\n", $12,  $13, $14}'

In fact, using the awk print & printf commands to isolate fields in a data stream and format them  is one of its most useful features.

PERL

Tying all of this together is the programming language PERL, but by embracing PERL you are moving out of old skool. PERL is a complete programming language in its own right. Anything you can do with awk, sed and grep can be done in PERL. In addition, it is a rich, full featured language.

Actually it's two languages. 

PERL 6 is not simply an upgrade to PERL 5. PERL 6 is more a sister language to PERL 5. It was developed with the intention of beefing up PERL with some of the features of more modern scripting languages like Ruby and Python. It was recognised early that many of the grammar structures of PERL 5 were incompatible with these desired features - hence a rewrite of the language was needed.

In other words -  Perl6 was written because various people in the Perl community felt that they should rewrite the language but without any definite goal of where they wanted to go or why. The vast majority of PERL users and programmers have stuck with PERL 5.

Another problem with PERL is its use of libraries, although this could also be marked as a strength. However keeping the libraries up to date requires juggling, so CPAN (Comprehensive Perl Archive Network ) was developed.  The idea of CPAN is to provide a network and a set of utilities to provide access to compatible repositories. The CPAN utility, however, is quite complex and another utility (cpanm - for cpan minus) was developed to simplify it. Yet another utility was developed called cpanoutdated to assist to determine library and module compatibility. After a great deal of experimentation, I developed the following method of ensuring a satisfactory base PERL installation on CentOS 7:

yum -y install perl perl-Net-SSLeay perl-IO-Zlib openssl perl-IO-Tty cpan
cpan App::cpanminus
cpanm Net::FTPSSL
cpanm App::cpanoutdated
cpan-outdated -p | cpanm

I like PERL, but it's an unwieldy tool. Sometimes, a shovel has more utility than a backhoe - but that's a metaphor for another blog entry.

For some time I forced myself to use PERL whenever I needed to do something mildly complex involving regular expressions. It took lots of time and involved debugging scripts. After a while I realised that the time spent disciplining myself with PERL was not worth it. What took me 30+ minutes in PERL could be done in 10 minutes in sed. For very complex scripts, Ruby or Python were better choices, but they all lacked the true grit of the old skool trifecta.

So, I learnt to stop worrying that nobody could read or understand these cryptic regular expressions and enjoy the simplicity, beauty and power of awk, grep and sed.

Friday 7 December 2018

On system security and cargo cult administration

I wrote yesterday's blog piece on Cargo Cult system administration as an intro to this post. It's essentially a warning - ignore the complexities of your systems at peril. So if you haven't read it yet, read it first before reading this entry.

Two days ago I was alerted to the fact that one of the FTP servers I had setup for a client had stopped working. This was a worry for a couple of reasons: Firstly, the server is quite simple, there's nothing that should go wrong with it; Secondly, this is the second time we've had a problem with this server this year (a unique issue which deserves its own blog entry). Two problems with a critical but simple server does not inspire confidence in a client.

As I said, the server was very basic: It's a stripped down CentOS 7.5 server running only sshd, proftpd and webmin. It's also well hardened - exceeding best practice.

I quickly checked all the basics and found the server was running normally. No recent server restarts and no updates to anything critical and certainly nothing matching the timeline given by the client when the server "stopped working". Nothing in any log files to indicate anything other than ftp login failures that started exactly when the client indicated. No shell logins to indicate intrusion or tampering. Config files have not been changed from the backup config files I always create. The test login I was given failed even after changing the password.

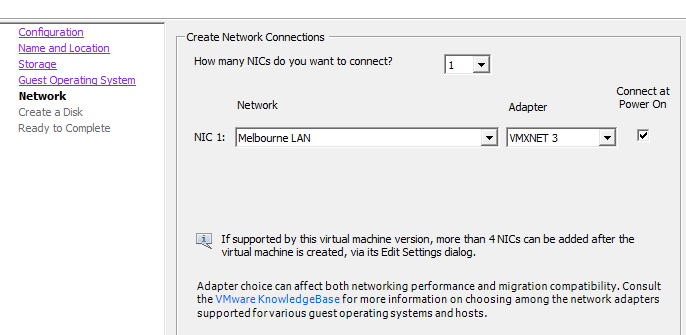
At the suggestion of a colleague, I changed the shell account from /sbin/nologin to /bin/bash. I indicated this wouldn't be the issue as this is something I routinely do for accounts that don't need ssh access and this was the way the server had been setup from the beginning.

However, changing the default shell did the trick!

???

I changed the default shell for all the ftp accounts and we were working again. But why? How?

The problem was now fixed and I could have easily left it at that cargo cult sysadmin style. It would have been easy to say "bug in proftpd" or something like that.

The purpose of the /sbin/nologin shell is to allow accounts to authenticate to the server without shell access. When you establish an ssh session, your designated shell is run. These days it is usually bash but it can be anything csh, ksh, zsh, tcsh etc. There are oodles of shells. The nologin shell is a simple executable that displays a message saying the account is not permitted shell access and exits. Simple, yet effective. The list of acceptable shells is located in /etc/shells which most sysadmins don't bother editing, they leave it at defaults unless an unusual shell is used. It includes bash and nologin.

I checked the PAM entry for proftpd. The PAM files lists the requirements for successful authentication to each service. It's very powerful and quite granular. The PAM file for proftpd contained:

This was expected: Proftpd authentication is by system password except for users in the deny list and requires a valid shell as defined by the pam_shells.so module. This checks /etc/shells for a valid shell. So, checking /etc/shells:

Huh? /sbin/nologin is absent! I checked the datestamps for /etc/shells and /sbin/nologin - the datestamp is Oct 31 - Just over a month ago????

This doesn't seem to add up. I interrogate the yum database to see if there have been any changes at all with proftpd or util-linux (which supplies both of the files). Yum doesn't show any modification even though the file dates don't match the repo.

Outside of an intrusion, what could modify a this file? It took some digging to find a potential culprit: SCAP (Security Content Automation Protocol).

The installation of CentOS/RHEL provides the following option under the heading "Security Policy":


This is where cargo cult system administration rears its head. The usual maxim is don't install or configure something you don't understand. If you do need it, make sure you understand it.

This screen is a front-end for scripts to ensure compliance with various security policies. It's dynamic and is designed to react to security threats in real-time. It's a powerful tool. It's also horrendously complex and something of a black art. Acknowledging this, the open-scap foundation advise:

There is no need to be an expert in security to deploy a security policy. You don’t even need to learn the SCAP standard to write a security policy. Many security policies are available online, in a standardized form of SCAP checklists.
Very comforting. Don't look to closely, just check the box and forget we exist. Ignore the Law of Leaky Abstractions and allow the script to take care of your security policies.

Notice the above screen shows the default contains no rules. This is from the CentOS 7.2 installation. From the CentOS wiki on Security Policy:

Previously, with the 7.3.1611 ISOs, we knew that all 4 of the STIG installs produced an sshd_config file that would not allow SSHD to start. This was an upstream issue (Bug Report bz 1401069). This issue has been fixed with the 7.4.1708 ISOs and all installs produce working SSHD now.
Security profiles "Standard System Security Profile" and "C2S for CentOS Linux 7" can't be used in the CentOS 7.5.1804 installer. A bug causes the installer to require a separate partition for /dev/shm, which is not possible. RHBZ#1570956
So until CentOS 7.4, you couldn't use SCAP without having a broken system. That pretty much ensures it didn't get used.

For this server - being CentOS 7.5 -  I'm pretty sure I chose the "Standard System Security Profile" thus becoming (in this instance) a cargo cult sysadmin. I selected an option I didn't fully understand the consequences of: It had nice sounding name, the description sounded kewl and it seemed this was the 'real' default. I remember looking up the definition and found it was a set of 14 very basic rules for sshd and firewalld security. What could go wrong?

What indeed.

It wasn't long before I found CVE-2018-1113. To quote the important part:

setup before version 2.11.4-1.fc28 in Fedora and Red Hat Enterprise Linux added /sbin/nologin and /usr/sbin/nologin to /etc/shells. This violates security assumptions made by pam_shells and some daemons which allow access based on a user's shell being listed in /etc/shells. Under some circumstances, users which had their shell changed to /sbin/nologin could still access the system.
The latest modification date on the CVE was Oct 31 - the same datestamp that I found on /etc/shells and /sbin/nologin. this looked curiously like a smoking gun.

At some point, this CVE translated into a Red Hat security advisory RHSA2018-3249.
Time to check the SCAP definitions:


This is curiously close to the date that ftp stopped working. This is also as far as I could get forensically. I'm not sure how the scap definitions updated, I assume that SCAP proactively fetches them and then applies them. This makes sense if SCAP is supposed to be dynamic responding to security advisories in real-time. That was the bit I overlooked in the description - if anything operates in real-time then it follows that it must have its own independent update mechanism.

After submitting my report I was asked if we should abandon SCAP. Again, the cargo cult administration reaction would be to say "yes". However, after some careful thinking I responded with "no". Applying the five whys leads to the appropriate conclusion:

Problem: FTP not working.
1st Why: Users could not login.
2nd Why: PAM authentication failing
3rd Why: /sbin/nologin not listed in /etc/shells
4th Why: Security policy update removed /sbin/nologin from /etc/shells
5th Why: Use of /sbin/nologin is subject to security vulnerability

The use of /sbin/nologin was my choice to prevent shell access, however my attempt to harden to system by denying ssh login for users was outside of the security policy. The problem was the use of /sbin/nologin in the first place (an old practice) rather than the preferred method of modifying the sshd config or placing a restriction within PAM.

The lesson (for me) is pretty sobering: If you intend to use best practice, use ONLY best practice, particularly with security policy. System modifications are often contain leaky abstractions and are only tested against best and default practice. If you choose to step outside that box, make damn sure you know and understand the system and its consequences fully.

And don't check boxes you don't fully understand. Even boxes that promise to magically summon system security from the sky.

Thursday 6 December 2018

On Cargo-Cult System Administration

During World War II, many Pacific Islands were used as fortified air bases by Japanese and Allied forces. The vast amount of equipment airdropped into these islands meant a drastic change in the lifestyle of the indigenous inhabitants.  There were manufactured goods, clothing, medicine, tinned food etc. Some of this was shared with the inhabitants, many of whom had never seen outsiders and for whom modern technology may as well have been magic - the purveyors of which seemed like gods.  

After WWII finished, the military abandoned the bases and stopped dropping cargo. On the island of Tanna in Vanuatu sprang the "John Frum" cult. In an attempt to get cargo to be dropped by parachute or land by plane, natives carved headphones from wood, made uniforms, performed parade drills, built towers which they manned, waved landing signals on runways. They imitated in every way possible what they had observed the military doing in an attempt to "summon" cargo from the sky.

The practice wasn't limited to Vanuatu, many other pacific islands developed "Cargo Cults". This may be surprising to us - even amusing - but fundamentally it stems from a disconnect between observed practice and an understanding of how systems (in this case logistical systems) work. The native observer has no idea that the actions of the soldiers they saw don't cause the cargo to appear, they merely facilitate it.

 Eric Lippert coined the phrase “cargo cult programming":
The cargo cultists had the unimportant surface elements right, but did not see enough of the whole picture to succeed. They understood the form but not the content.  There are lots of cargo cult programmers –programmers who understand what the code does, but not how it does it.  Therefore, they cannot make meaningful changes to the program.  They tend to proceed by making random changes, testing, and changing again until they manage to come up with something that works.

The IT world is rife with Cargo Cult System Administrators. It usually manifests itself as an instinctive reaction to reboot a server as a first resort when anything goes wrong, without any effort to understand cause and effect and if that doesn't work, they start disabling firewalls, or running system cleaners. If they actually manage to fix a problem, they invent a reason with no evidence (It must have been a virus). If they are reporting to someone non-technical (which is usually the case) then this often gets accepted. 

The big problem with "fixes" like this is they often cause collateral damage or degrade performance or system security.

How do these people keep jobs in IT? It's not surprising this level of ignorance exists amongst the lay users, it shouldn't exist in support staff. But if those in charge of IT hiring are not themselves experts, they don't know any better either and there seems to be this idea that a non-technical manager is perfectly capable of overseeing IT Departments. 

With increasing complexity of systems, it is all the more important to hire people that actually know what they are doing. At the very least, you need people that don't think it is somehow mystical and have a grounding in the basic technologies - that at least understand binary and hexadecimal number systems; have a grounding in basic electronics and circuit theory; can follow and develop algorithms and cut code in at least one programming language; can formulate troubleshooting steps from a block diagram of the system; that understand the principle of abstraction and working through layers of abstraction.

A simple yet effective method of Root Cause Analysis of any problem is known as 5Ys (Five Whys) was developed by Sakichi Toyoda and adopted as best practice by the Toyota Motor Corporation. In it's simplest form, it involves ask an initial 'why' question and getting a simple answer. You then ask 'why' to the answer and work it out, next you ask 'why' to that answer until you've asked why five times and giving five increasingly low level answers. When you can no longer ask 'why' you have your root cause. An example of 5Ys is:


The vehicle will not start. (the problem)
  1. Why? - The battery is dead. (First why)
  2. Why? - The alternator is not functioning. (Second why)
  3. Why? - The alternator belt has broken. (Third why)
  4. Why? - The alternator belt was well beyond its useful service life and not replaced. (Fourth why)
  5. Why? - The vehicle was not maintained according to the recommended service schedule. (Fifth why, a root cause)
An extension of this method is the Ishikawa diagram - also known as a fishbone diagram.

So, the next time you are tempted (or pressured) to reboot a server because it is not "working" perform 5Ys as starting point. Find out what isn't working and ask why. Look at all the possible things that could stop it from working and test them out one at a time. You may end up rebooting the server, but you will have a better understanding of how the system you are fixing works and maybe even put in preventative measures to stop this occurrence from happening again.